Hello dear friends! So, sometimes I get into these intense modes of operating. Like, when I get going with cleaning the house, I work hard and at a ridiculously fast pace, or when I start doing projects, I am totally focused and driven. When I get into these modes a few things happen: I get a ton done, I become incredibly exhausted, and I literally can’t stop….well, it’s really hard to stop. #woesofbeingtypeA
It was during one of these intense workaholic modes that I had just finished my farmhouse table and couldn’t put the power tools down, so, I saw some materials, came up with an idea, and with no planning or aforethought, made a chalkboard easel. I want to share with you 5 uses for chalkboard easels and how to make one yourself.
As I was making it, I came up with all kinds of great ways to use it! For instance:
- an art platform for our toddler
- a sign for events like weddings and showers
- decoration for the house that can be changed with the season
- an organizational tool
- a photo backdrop
But there’s so much more! Could you use a multifunctional tool like this? I mean, who doesn’t need a big chalkboard easel in their lives? Well, if you are nodding your head “yes”, then stick around and I’ll show you how to make it!
What you will need (Affiliate links below indicated by a *):
- Plywood (size of your choice)(finished on one side)
- Pallet boards (or 1x2s) (enough to cover the four sides of your plywood) (could I be more vague?)
- Chalkboard Paint*
- 1 ½” screws
- Circular saw*
- Drill* or impact driver*
- Measuring tape
- Square
- Pencil
This project is easy and takes about 2 hours to complete (not counting drying times)
Alright, here we go with a tutorial on how to make a Chalkboard Easel: Start by cutting your plywood to the desired width and height. Mine was a scrap from another project so it was already the perfect size. Once it’s cut, sand it so it’s really, really smooth. Smooth chalkboards are nicer to write on.
Then start painting on your chalkboard paint.
While that is drying, construct the frame. Measure the width and height of the plywood you cut. Use that as your measurements for the lengths of the boards. Once you’ve marked the proper length, use a square to mark a 45 degree angle on each end (making sure the long ends are on the same side of the board of each other).
Cut those beautiful boards up and check on your drying paint.
I considered many different options for attaching the frame, but it came down to what was easy and on hand: a drill and screws. I’m never too worried about screw heads showing on my projects (they are “charming imperfections”) I just drove those suckers right through from the top. So, position your boards along the sides of your chalkboard painted plywood and screw them in from the corners.
The last thing I needed to do was make the whole thing stand up on its own. My original idea was for a hinged leg so that it could be folded and stored nicely, but I couldn’t find a hinge, and crazy, type A project mode wasn’t going to let me stop and drive to the store to get one. Instead I drove two screws into the back about two thirds of the way up and grabbed a scrap pallet board to lean it against.
Simple and effective.
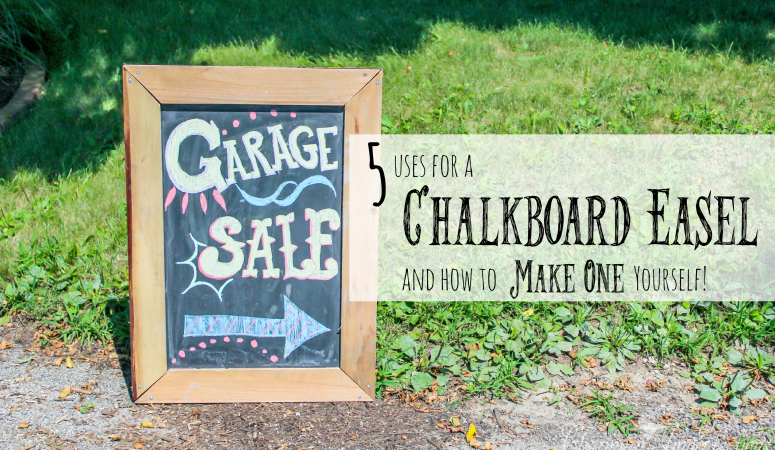
Now, I have a brilliant chalkboard easel that stands on its own, which makes it great for my toddler to color on, or to use as a Garage Sale sign for the near future (and you can bet your buttons you’ll see some posts on that).
When I’m done with that I’m going to use it as a calendar for our home. There are so many uses! Maybe I’ll make another one, who knows?
So, are you ready to get your DIY on and make this multifunctional chalkboard easel with supplies you probably have on hand? You now know why it would be so useful. You also know how to go about making one. All you need now is a couple of hours of free time! Have fun!
Oh, my! Why have I never thought of that clever solution of the two screws on the back to hold everything up. You’re so smart! LOVE the look of your chalkboard easel!
Thank you so much Jamie! Necessity is the father of invention around here 😉