*This post contains affiliate links which are indicated by an (*). I never recommend a product I don’t use and love.
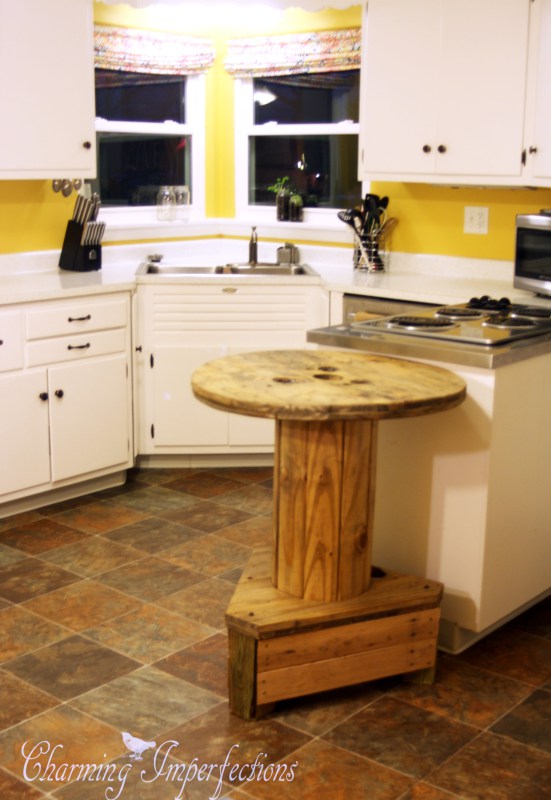
The first time I walked into what would eventually become our new house’s kitchen, I immediately fell in love with the corner window. I could just see myself enjoying the view of the small cattle farm across the road while I did dishes and cooked. Our apartment that we were living in had a brownish-yellow wallpaper wall behind the sink and I constantly longed for something to look at.
Now that we are all settled in, there was one thing about that corner that needed to be addressed. The light fixture above the sink. There, in all it’s ugliness, was a fluorescent tube light. That thing was so annoying! It would take at least a minute to actually turn on and then it would flicker its harsh white light, giving me headaches and adding no aesthetic value to the room. It was an opportunity missed in my opinion and it had to go.
This is the only picture I could find of the monster, but picture it there where the bright light is coming from.
Of course, I wasn’t going to go to the store and pick up just any old light fixture. No, it had to be DIY and charming to occupy such an important space.
Cue: Gorgeous Mason Jar Chandelier.
This light fixture was so easy to put together and makes such a big statement in our kitchen.
The materials used were:
>>*Ikea Hemma Cord Set, black![]() - at $9.95 these were the best deal I found for the quality. I wanted the cord to be nice and rounded and the light socket to have a lip on it to hold the mason jars. It took quite a bit of research, but I’m so glad I ended up getting these.
- at $9.95 these were the best deal I found for the quality. I wanted the cord to be nice and rounded and the light socket to have a lip on it to hold the mason jars. It took quite a bit of research, but I’m so glad I ended up getting these.
 >>*Kerr Mason Jars
![]() - Normally I find jars at garage sales and thrift stores, but since I needed them with sturdy lids and all matching I went ahead and bought a set like this. At $10.00 for 12 they really are still a great deal.
- Normally I find jars at garage sales and thrift stores, but since I needed them with sturdy lids and all matching I went ahead and bought a set like this. At $10.00 for 12 they really are still a great deal.
>>Pallet wood for the box to hang the cords from.
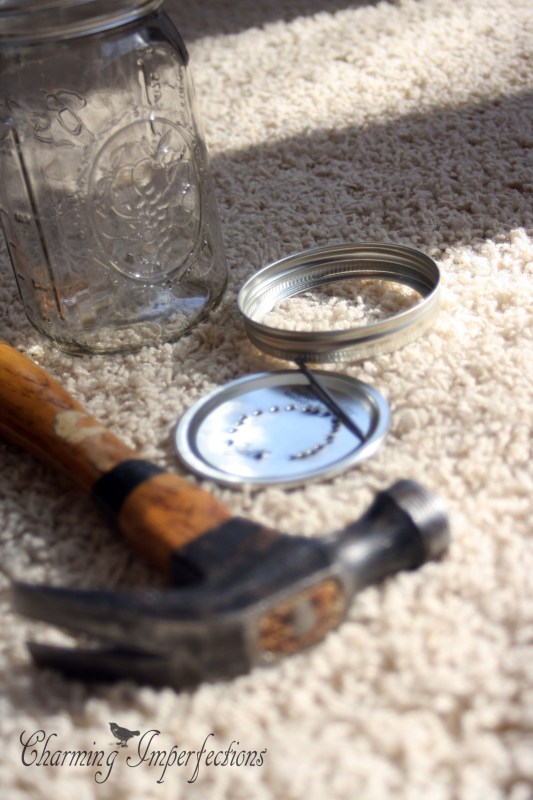
>>Hammer and a nail.
>>*LED lights![]() - I got a little expert advice from my Dad who really recommended LED lights for this project for several reasons: (1) they don’t heat up and you won’t have to worry about the jar exploding, (2) they truly do last years longer than the traditional bulb or even fluorescent, (3) they don’t use nearly the same amount of energy. (He actually recommended we switch out all the lights in the house with these. They are that good.) I was a little skeptical about the brightness, but once we got that thing hung up all my doubts went away. When we bought them they were on sale for $11.99 for a pack of two.
- I got a little expert advice from my Dad who really recommended LED lights for this project for several reasons: (1) they don’t heat up and you won’t have to worry about the jar exploding, (2) they truly do last years longer than the traditional bulb or even fluorescent, (3) they don’t use nearly the same amount of energy. (He actually recommended we switch out all the lights in the house with these. They are that good.) I was a little skeptical about the brightness, but once we got that thing hung up all my doubts went away. When we bought them they were on sale for $11.99 for a pack of two.
>>Hinges- I only stuck these on because they were cool and old-looking and added a little character to the box
>>Minwax Grey Stain
Ok, so what you want to do once your lovely light socket cords arrive in the mail is trace the round opening on the top of your mason jar lid.
Then, using your hammer and nail, puncture the circle over and over and over until you can pop that baby out. This was a good project to while watching a few Fixer Upper episodes (love them!).
Thread the cords through the holes, put your light bulb in, and screw on the jars. Presto!
I have to apologize, I didn’t take pictures of the process of making the box. It really was as simple of putting four boards together in a square and filling in the middle with a couple of boards. If you would like more direction, please, don’t hesitate to ask in the comments below and I would be supper happy to help! I then coated the box in Minwax grey stain, which doesn’t match anything in our kitchen currently, but hopefully when we renovate will be the type of color and style reflected throughout. Hows that for planning ahead?
Now, the cords, while wonderful, had one flaw. They had a plug for an end, which would have meant switching the wiring in the ceiling to become an outlet, rather than a light fixture set up. This was an easy fix, we just cut them, spliced them (if you don’t know what that means, it might be a good idea to have an electrician, or someone with electrical experience take it from here), and connected them with wire plugs. I was super excited to get to learn how to do all this fun electrical stuff from Mr. Charming who will be starting his electrical apprenticeship this year (prayers appreciated for that big, exciting change).
I was so pumped about how it was looking, and couldn’t wait for Mr. Charming to get home to help install the light, that I went ahead and did it myself!
My absolute favorite part about this light fixture is that during the day, it allows the natural daylight to stream through it, which is important in a windowed corner like this. It ensures that we are getting the best possible lighting at any time of the day. Plus, the morning sun looks magical shimmering through the glass.
At night it takes on a whole new character, no longer taking the back seat to let the window be the center of attention, but literally becoming the spotlight of the room! I was really surprised at how pretty it turned out. I expected a rustic or industrial look, but the way the LED lights shimmer off the glass creates gives it a crystal look.
As I’m looking at these pictures my disdain for that yellow increases. I was tempted to paint just that corner just for this post, but I’ll wait until we have time for the entire room.
Would you take on a project like this? If you are considering it, let me give you a little encouragement. It was really quite simple and hugely rewarding!
I really love hearing from you! Comment your thoughts below


LOVE, Love, love this!!!!! I have that exact corner, including the cabinets that come only about 2-feet above the counter. Same windows, small sink-everything the same in my 1940 bungalow. I’ve been trying to figure out what to do there for nearly the entire time I’ve lived here and now I know! Just need an electrician to put electrical there since there isn’t a fixture over the sink. I’ve also wanted to do away with the valances, but never knew exactly what to do-Roman blinds it is!
Thank you SO much for the inspiration! I’m going to print the pics of the corner and hang it on my fridge to remind me to get on it!
Oh my gosh, you are too sweet! I am totally flattered that you like it so much and were able to find inspiration for your own kitchen! Best of luck to you!