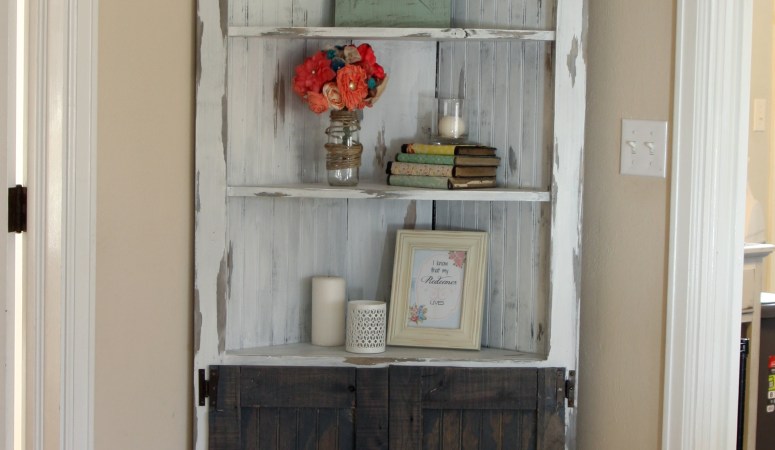
It’s hard to furnish or decorate because it’s too small. Ignore it and it leaves too much blank space in your otherwise handsomely decorated home. Overcrowd it, and it distracts from the rest of the room. Almost every house has one somewhere: it’s that tiny, problem causing corner between two doors. I’ll venture to bet you have one in your home and you’ve exhausted your ideas on what to do to make it more than just dead space.
That’s where we were not too long ago. Our difficult corner is in the living room where the dining room and kitchen meet. I tried putting a bookshelf on one side of the corner or the other, but hated the configuration and turning it diagonally just felt like a waste of space. Eventually, I came to the conclusion that we needed something custom built that would add functionality and style to that corner. I turned to my favorite person for free project plans: Ana White. She had a corner cabinet that was exactly what we needed! It could be exactly what you need as well for your funny, small corners.
I’m not going to give a full tutorial here as the one on Ana White’s is so good. This post is just a summary of what I did.
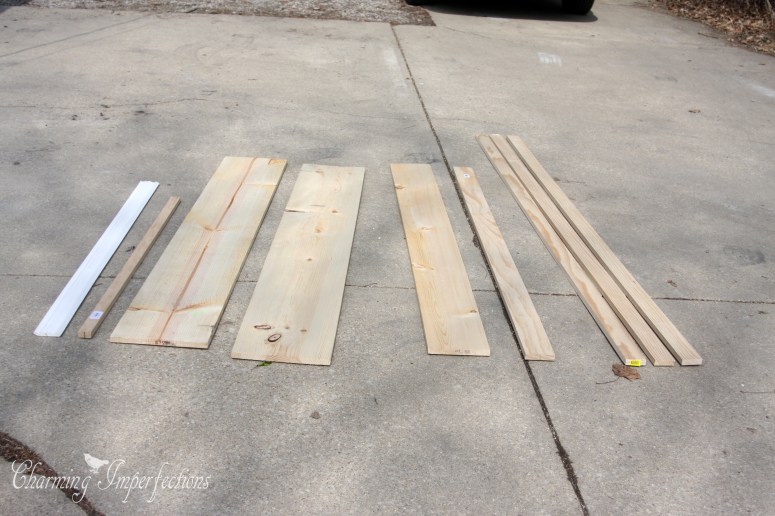
Material List:
- Two 1x12s, 6 feet long
- One 1×8, 6 feet long
- One 1×4, 6 feet long
- One sheet of bead board, preferably 1/4″ to 3/8″ thick
- Three 1x3s, 8 feet long
- One 1×2, 3 feet long
- One 36″ long crown molding or other molding
- Cabinet Knobs
- Overlay Hinges
- Door closing mechanism
Tools Used
- Circular saw
- Jig Saw
- Power Drill
- Tape Measure
- Pencil
- Square
- 2” screws
- 1’1/4” screws
- 3” screws
- Wood Glue
It looks like a lot, but overall only cost me about $80.00. Now, let’s get on with the tutorial!
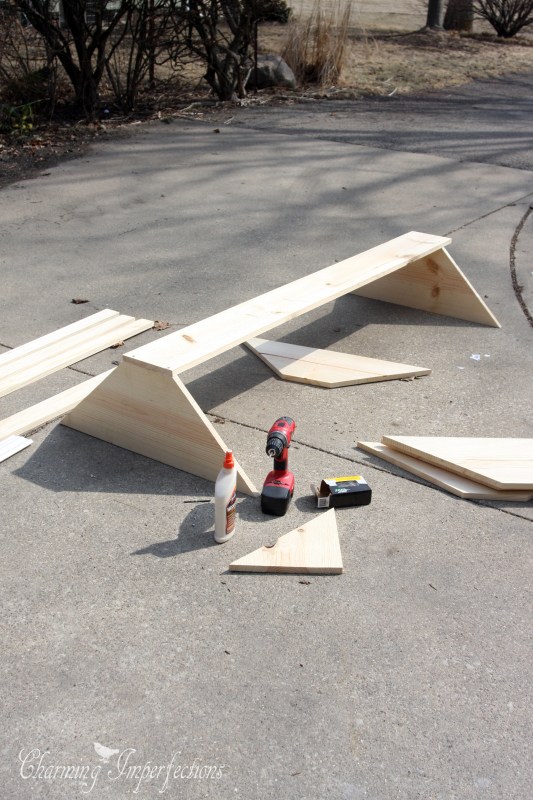
Step 1:
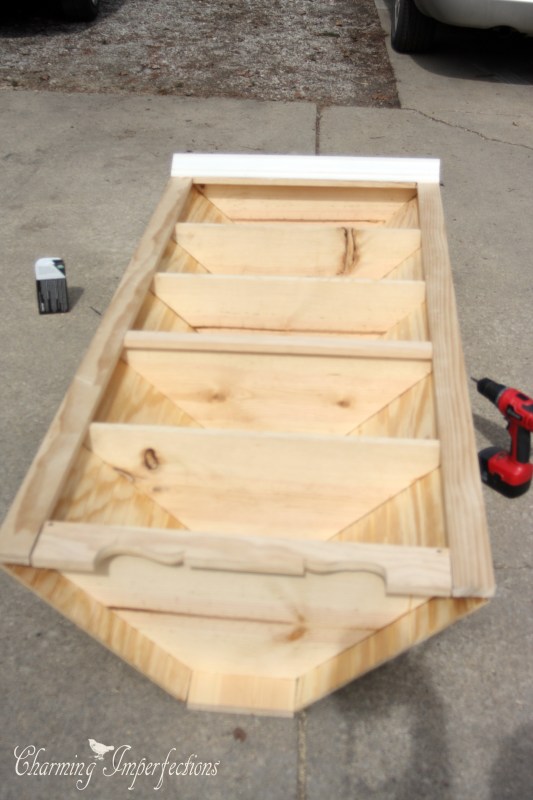
Cut one of the 1×12’s to make the shelves. Do this by marking at 30 ½ inches and then cutting at a 45 degree angle from there. To save wood, continue this in a zig-zag pattern by flipping the board over each time.

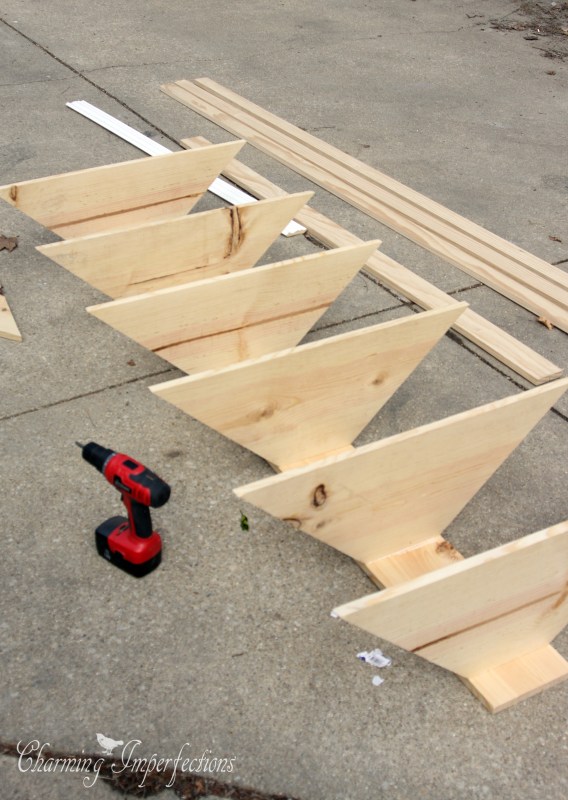
Step 2:
Attach the shelves onto the remaining 1×12 with your 2 inch screws. Pay attention to how far apart they are in order to achieve the standard table top height for the first shelf above the cabinet doors. You can find the exact measurements on Ana White’s page.
Step 3:
Screw in the front side trim to the shelves by gluing and pre-drilling your holes. Use 2 inch and 1 1/4 inch screws.

Step 4:
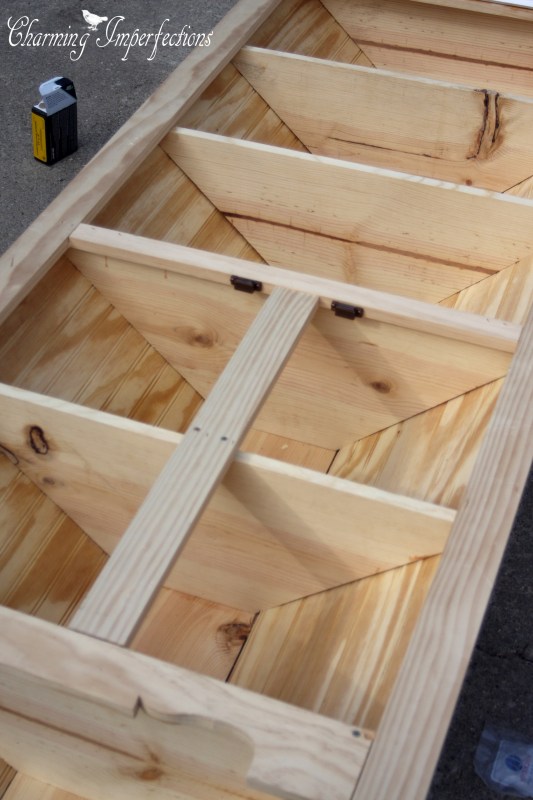
Attach the bead board to the back of the shelving unit by pre-drilling at every shelf. Make sure any unfinished edges are toward the outside corners as those are the least visible (a mistake I made and realized too late).

Step 5:
Chose a design for your bottom trim (or leave it fairly plain) and use a jig saw or circular saw to cut out your design. I decided on something a little fancier as an excuse to use my jig saw. Attach that with 2” screws and then attach a bit of crown molding to the top of the cabinet.
Step 6:
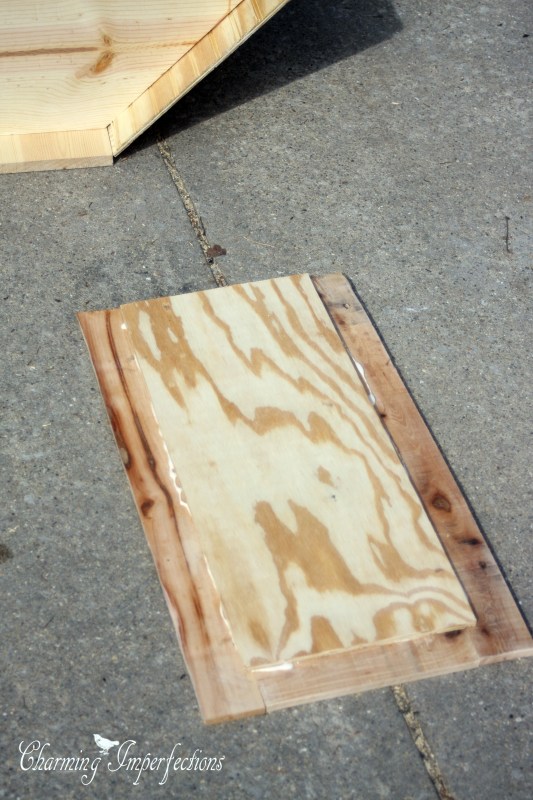
Create the doors by first cutting a 1×3 into 8 sections: four that are 25” long and four that are 13 ¼” long.

These are the frames. Once those are glued and secured together, cut a piece of bead board for each door to cover the inside of the frame you just made. Make sure the bead board is cut so that it will fit into the space left by the shelves (another mistake I had to correct).
Step 7:
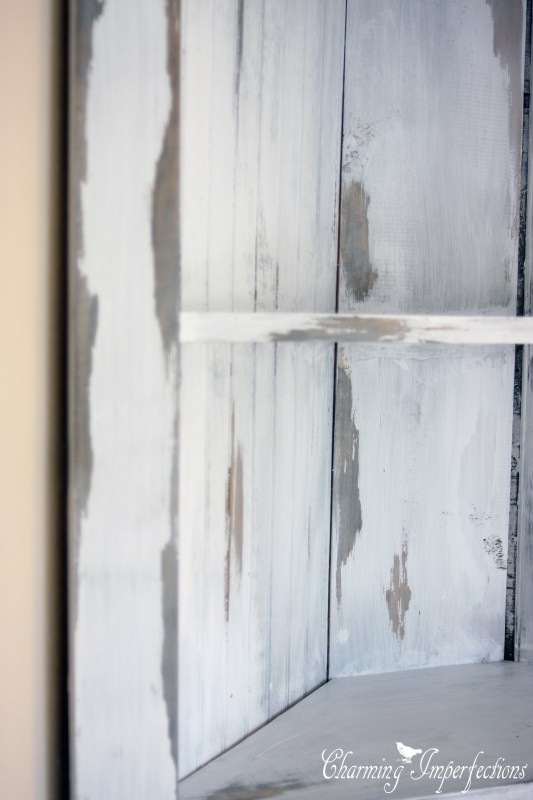
Now it’s time to get painting! To start off I applied a coat of grey Minwax stain as the undercoat because my plan was to distress the cabinet.
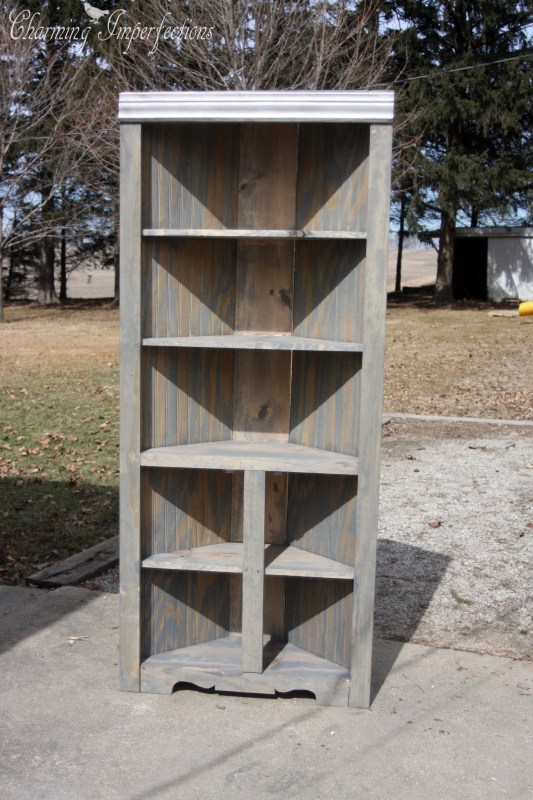
Once that was dry I used my chippy paint technique by spreading Vaseline in the areas I wanted the paint to look chipped and then painted over the entire thing with white. To get the chipped areas to show, I had to rub a rag over them after the whole thing dried.
Step 8:
The last thing to do before bringing it inside is to install your door knobs, hinges, and magnetic door holder mechanisms.
I had a little trouble finding the right kind of hinge, so make sure you look up the different kinds before purchasing and taking a bunch of trips back and forth from the hardware store! What I should have gotten from the start were overlay hinges.
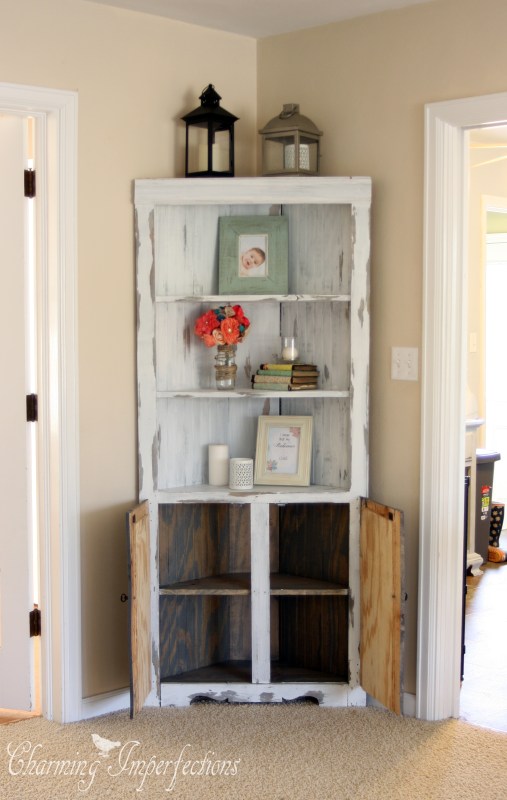
Now that you have it all put together, slide that beautiful cupboard into your awkward corner and just revel in the functionality and style of it! What once was an eyesore corner in your home is now a selling point with this perfectly fitted piece of furniture. The most satisfying part is: you made it on your own. We are certainly pleased with how ours turned out and completely believe that every corner needs a cabinet!


Wow, you’re kind of amazing! I can’t believe you made this from scratch because it looks like something straight out of a catalog. Great job!!
What an awesome project! We have a corner in our house that we’ve scoured our local estate sales and thrift stores for a cabinet similar to this one. Now I’ll just have to build one